Réalisation d'une voiture télécommandée (via bluetooth) composée de deux moteurs 3V DC.
Materiel utilisé :
- Une carte Arduino UNO Rev. 3
- Un chassi, deux roues et une bille pour équilibrer la voiture
- Deux moteurs de 3V DC
- Un modem bluetooth avec une connexion série (3.3V DC)
- Un pont H L293D
- Des piles pour alimenter le tout (arduino + moteurs)
Schéma du circuit :
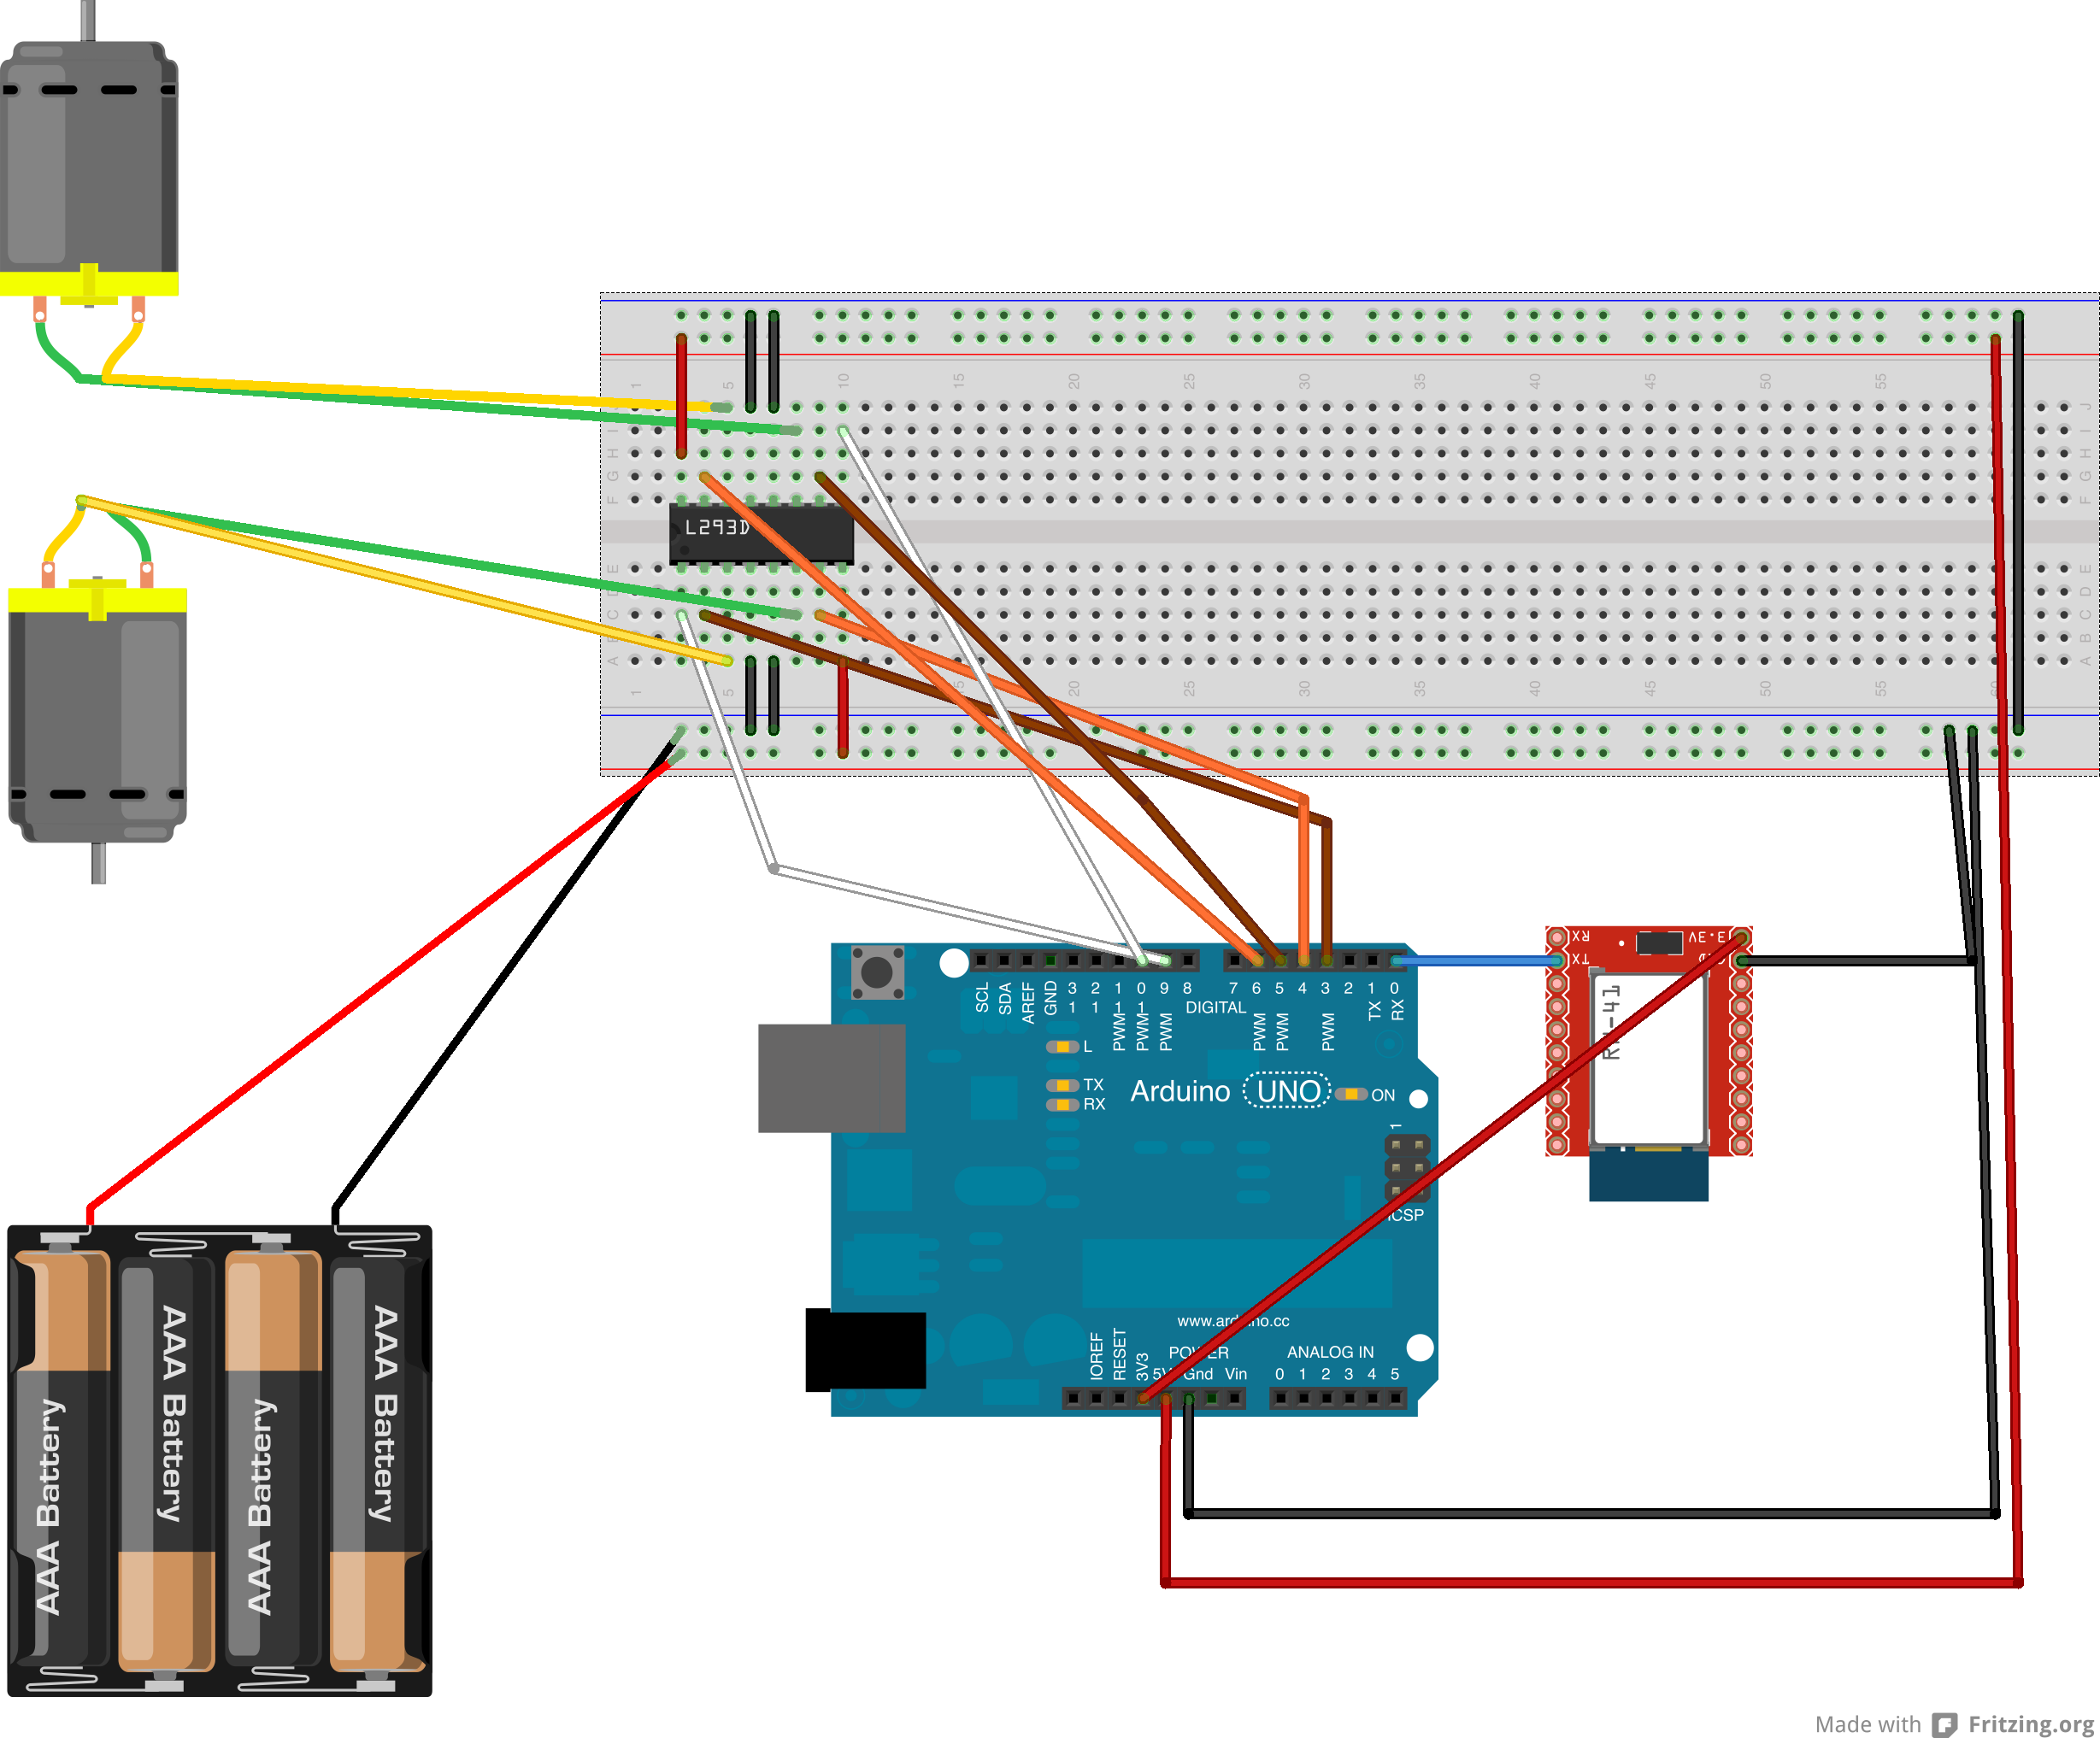
Programme Arduino :
/*
  Blink
  Turns on an LED on for one second, then off for one second, repeatedly.

  This example code is in the public domain.
 */

#define LEFT_F B00001100
#define RIGHT_F B00000011
#define LEFT_B B11000000
#define RIGHT_B B00110000

// Pin 13 has an LED connected on most Arduino boards.
// give it a name:
const int ledPin = 13;

const int lm_i1 = 3;
const int lm_i2 = 4;
const int lm_e = 9;

const int rm_i1 = 5;
const int rm_i2 = 6;
const int rm_e = 10;

//The ping value is the last cmd received by the bluetooth module
//If no ping for 300ms: we stop the motors (ex: out of range of the bt transmiter)
unsigned long ping;

void mdir(byte b){
  int h = HIGH/2;
  if( b & (LEFT_F|LEFT_B) && b & (RIGHT_B | RIGHT_B) )
    h = HIGH;

  digitalWrite(lm_e, b & (LEFT_F | LEFT_B) ? HIGH : LOW);
  digitalWrite(rm_e, b & (RIGHT_F | RIGHT_B) ? HIGH : LOW);

  if( b & LEFT_B ){
    digitalWrite(lm_i1, LOW);
    digitalWrite(lm_i2, HIGH);
  } else {
    digitalWrite(lm_i1, HIGH);
    digitalWrite(lm_i2, LOW);
  }
  if( b & RIGHT_B ){
    digitalWrite(rm_i1, LOW);
    digitalWrite(rm_i2, HIGH);
  } else {
    digitalWrite(rm_i1, HIGH);
    digitalWrite(rm_i2, LOW);
  }

}

void mstop(){
	digitalWrite(lm_e, LOW);
	digitalWrite(rm_e, LOW);
        led(0);
}

void led(int on){
	digitalWrite(ledPin, on ? HIGH : LOW);
}

// the setup routine runs once when you press reset:
void setup() {
	// initialize the digital pin as an output.
	pinMode(ledPin, OUTPUT);

	//left motor
	pinMode(lm_i1, OUTPUT);
	pinMode(lm_i2, OUTPUT);
	pinMode(lm_e, OUTPUT);

	//right motor
	pinMode(rm_i1, OUTPUT);
	pinMode(rm_i2, OUTPUT);
	pinMode(rm_e, OUTPUT);

        Serial.begin(9600);

        ping = millis();
}

// the loop routine runs over and over again forever:
void loop() {
        while( Serial.available() > 0 ){
          byte b = Serial.read();
          ping = millis();
          led(1);
          switch(b) {
            case 0x55:
              //ping
            break;
            default:
              mdir(b);
            break;
          }
        }
        if( millis() - ping > 300 ) {
          led(0);
          mstop();
        }

        delay(1);
}
J'ai choisi le bluetooth pour pouvoir piloter facilement la voiture depuis mon iPhone. Malheureusement l'iPhone ne peut communiquer qu'avec des périphériques Bluetooth 4 (low energy). Heureusement que btstack est là. Btstack remplace la pile Bluetooth d'iOS (sur les appareils jailbreakés) et permet de se coupler avec des périphériques BT < 4.0.
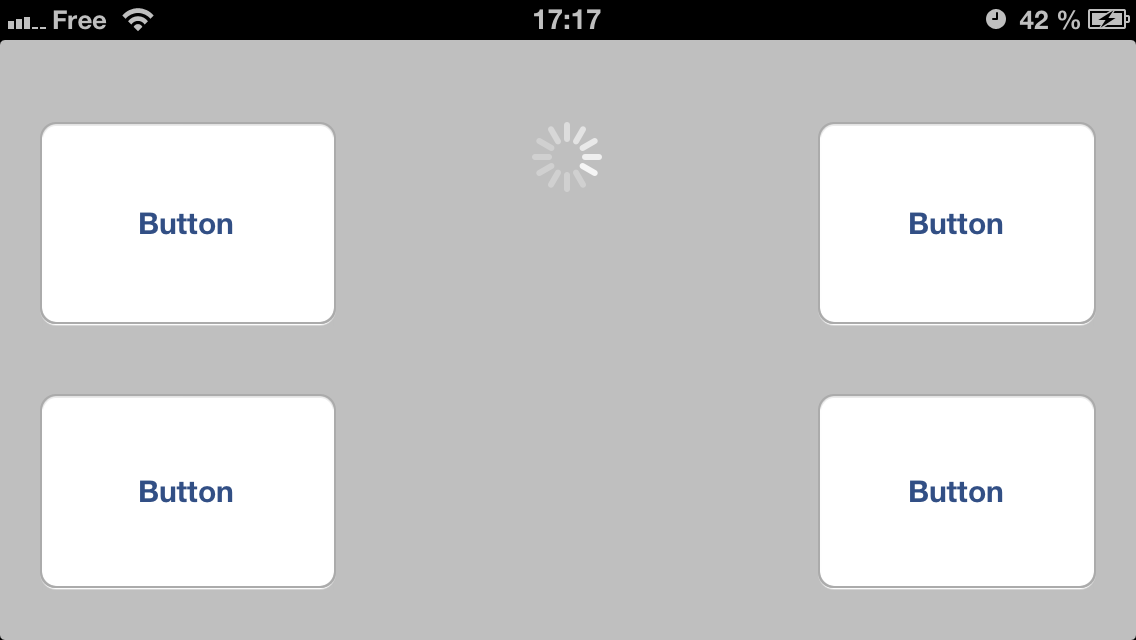
Les deux boutons de gauche servent a diriger le moteur gauche (avant/arrière) et les boutons de droite a diriger le moteur de droite.
Sources :
- Schema du circuit : HydeCar-Schema.fzz (Fritzing app)
- Arduino sketch : hydecar.ino
-
iOS app : HydeCar.zip (requiert un appareil jailbreaké avec btstack installé)
Le code actuel se connecte à l'appareil 20:12:01:21:10:92 avec le pin 1234.
Videos :
Hyde.fr -ftp